The High & Wide Rule: How to Hang Curtains Correctly
Stop hanging your rods on the window trim. Here is the math to make your windows look twice as big and your ceilings look taller.

The "High Water" Pants of Interior Design
If you walk into a room and it feels "stuffy" or the ceiling feels low, look at the windows.
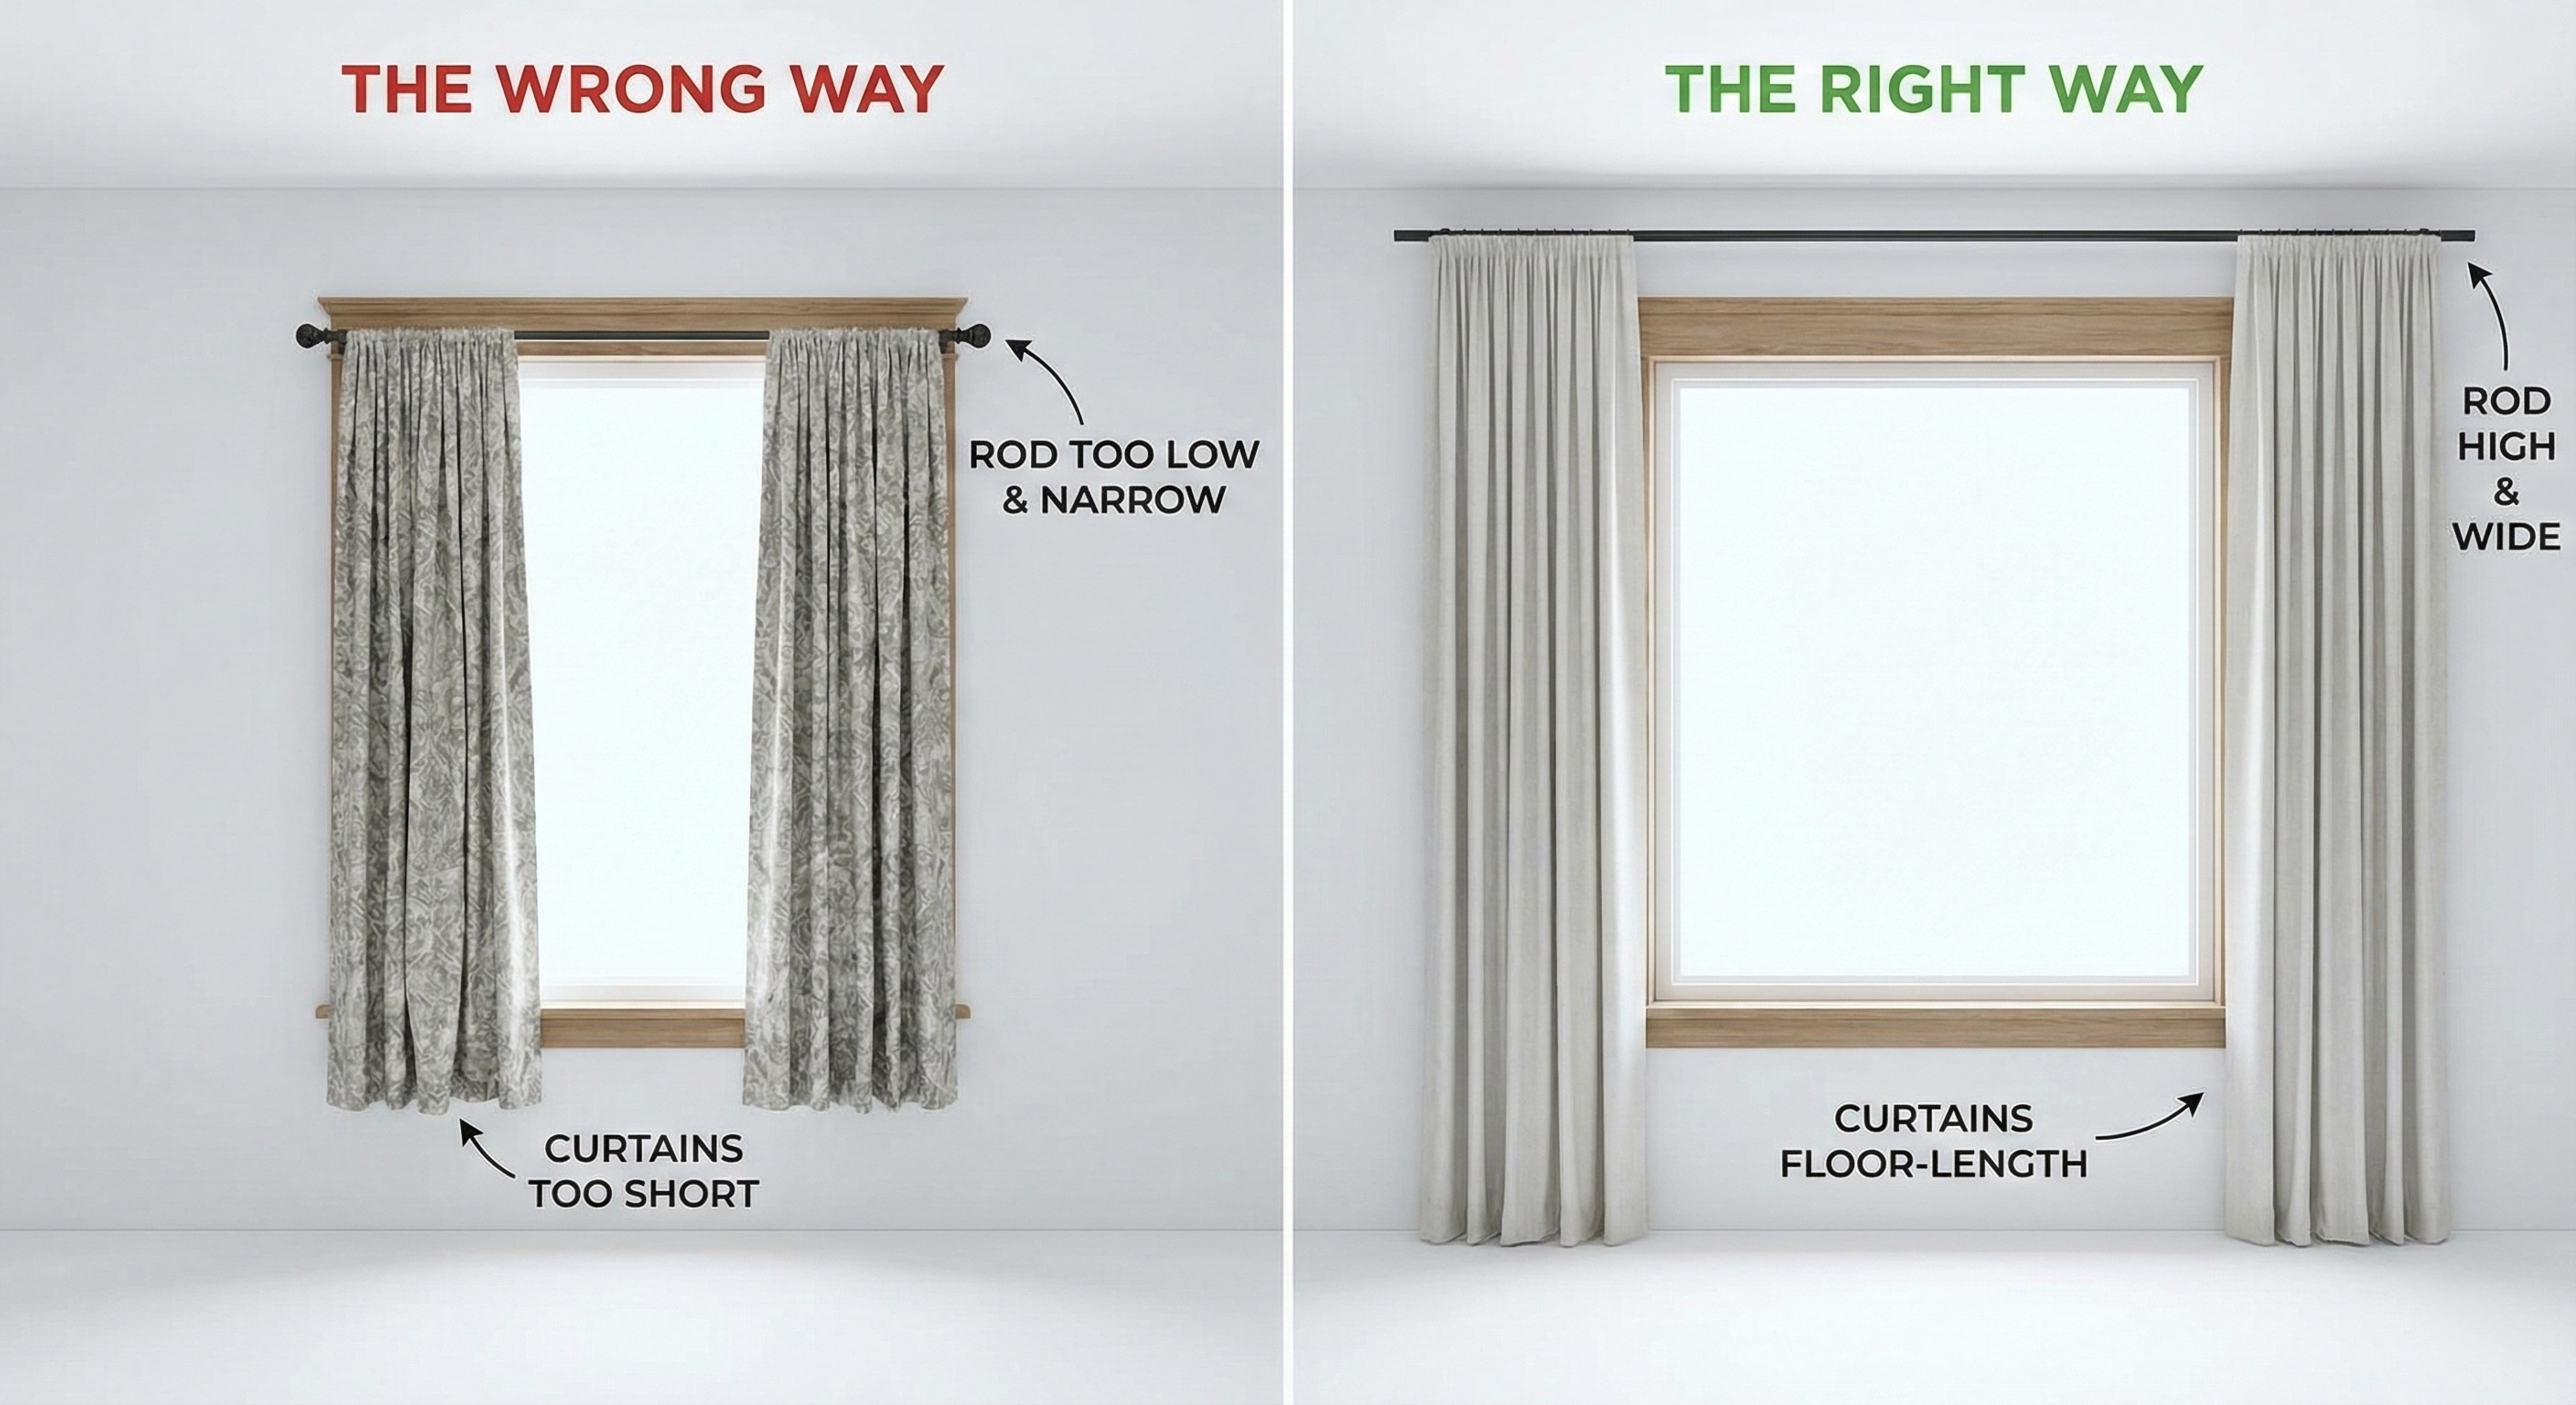
The most common decorating mistake is hanging curtains exactly the size of the window. It creates a boxy, claustrophobic effect. It is the architectural equivalent of wearing pants that are three inches too short.
Designers use a simple trick called "High and Wide" to fool the eye into thinking a window is massive, even if it is a standard builder-grade size.
Here is the exact math to replicate that luxury look.
Rule 1: Go High (The Vertical Math)
Your goal is to lift the eye upward.
The Mistake: Mounting the curtain rod bracket directly onto the wooden window trim. The Fix: Mount the rod halfway between the top of the window trim and the ceiling (or crown molding).
- Minimum: Go at least 4 to 6 inches above the window frame.
- Ideal: If you have standard 8-foot ceilings, mount the rod as close to the ceiling (or crown molding) as possible—leave about 1-2 inches of breathing room.
Why it works: It exposes the wall space above the window, tricking your brain into thinking the window opening is taller than it actually is.
Rule 2: Go Wide (The Horizontal Math)
You want to see the glass, not the fabric.
The Mistake: Buying a rod that is the exact width of the window. When you open the curtains, the "stack" (the bunched-up fabric) covers the outer edges of the glass, blocking natural light. The Fix: Extend the rod past the window frame.
- The Calculation: Add 8 to 12 inches to each side of the window.
- Example: If your window is 40 inches wide, your rod should be 56 to 64 inches wide.
Why it works: When the curtains are open, they hang against the wall, not the glass. This maximizes daylight and makes the window frame appear much wider.
Rule 3: The "Kiss" (The Length Math)
How long should the panels be?
- The Kiss: The curtains barely touch the floor. This is the tailored, modern standard.
- The Puddle: The fabric creates a 1-2 inch pool on the floor. This is romantic/traditional but collects dust/dog hair.
- The Flood (Avoid!): The curtains hover 1-2 inches above the floor. This looks cheap and accidental.
Measuring Tip: Measure from your planned rod height (Rule 1) to the floor. Do not buy standard 84-inch panels unless you have very low ceilings. You likely need 96-inch or 108-inch panels.
Rule 4: The Fullness Factor
One panel per side usually looks skimpy.
The Ratio: The total width of your curtain fabric should be 2 to 2.5 times the width of the window.
- Example: For a 40-inch window, you want roughly 80 to 100 inches of fabric total width.
- Standard Panels: most panels are ~50 inches wide. You need at least 2 panels (one per side) for a small window, but for a 6-foot sliding door, you might need 4 panels.
Furniture Placement & Curtains
Before you drill holes high and wide, check your floor plan in RoomyLab.
- Check the "Stack": If you extend your rod 12 inches past the window (Rule 2), will the curtain bunch up behind your sofa or bookshelf?
- Radiators: If you have baseboard heaters or radiators under the window, floor-length curtains are a fire hazard. You will need roman shades instead.
- The Bed: If a window is behind your headboard, you need to ensure the curtain rod is wide enough so the panels don't hang directly in your face while sleeping.
Use the tool to measure the distance from the window edge to the nearest corner or furniture piece. If you only have 6 inches of wall space, you can't do the "12-inch wide" rule!
Inspired? Start planning now.
Use our free browser-based tool to visualize this advice in your own home. No account needed.
Launch RoomyLab Editor