How to Trace an Existing Floor Plan
Stop drawing from scratch. Learn how to upload a photo of your blueprint and turn it into a digital model in minutes.
Stop Drawing from Scratch: Use the "Trace" Cheat Code
One of the most frustrating parts of starting a new floor plan is the "Blank Canvas Anxiety." You stare at the white grid, trying to remember if your living room is 12 feet wide or 14 feet wide.
I built the Trace Plan feature in RoomyLab specifically to solve this. Instead of manually drawing and measuring every single wall, you can just take a picture of an old blueprint (or even a Zillow listing screenshot) and trace right over it.
This is the exact workflow professional architects use when renovating old buildings. They don't remeasure everything; they import the existing PDF and trace it. Here is how you can do the same thing in your browser.
Step 1: Get Your Reference Image
You don't need a high-res CAD file. You can use:
- A photo of an old blueprint you found in a drawer.
- A screenshot of the floor plan from a real estate listing (Zillow/Redfin).
- A hand-drawn sketch on graph paper.
- A fire escape map (often found on the back of hotel doors!).
Note: Ensure the photo is taken from directly above (birds-eye view). If you take the photo at an angle, the perspective will be skewed, and your measurements will be wrong.
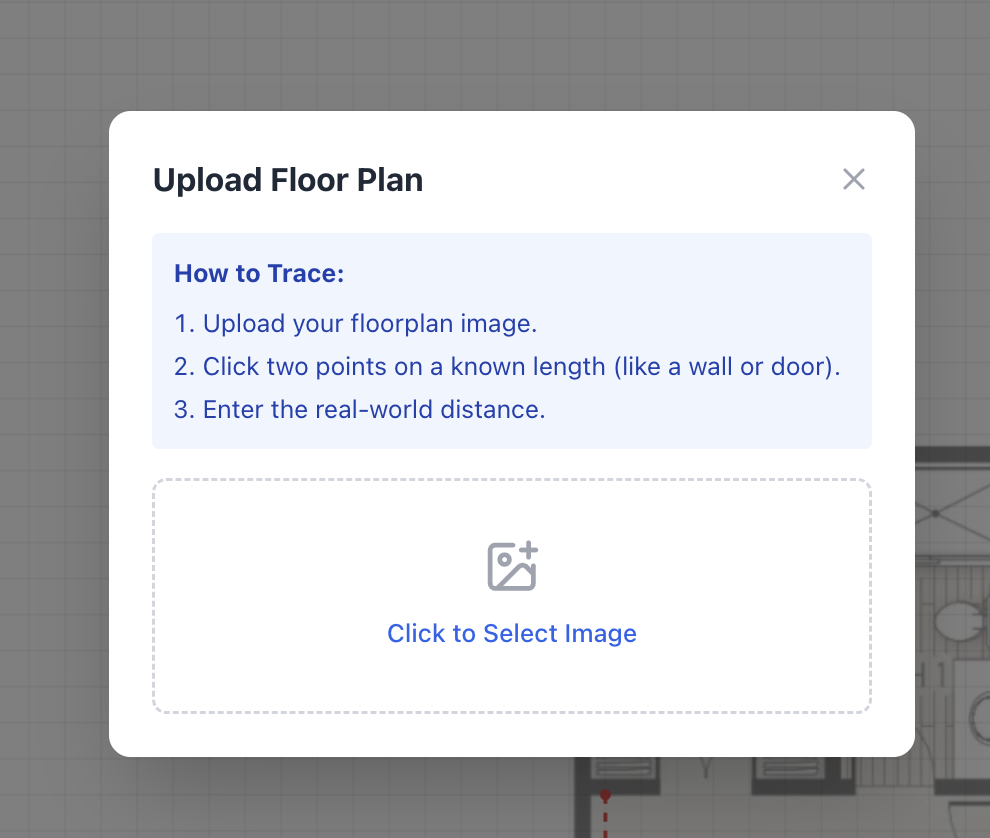
Step 2: Upload to RoomyLab
In the RoomyLab sidebar, look for the Trace Plan icon (it looks like an image with a plus sign). Click "Upload Background" and select your file (JPG or PNG).
Step 3: The Calibration Trick (Crucial!)
This is the most important part. Your computer doesn't know if that image is a stadium or a bathroom. You have to give it a "Reference Scale."
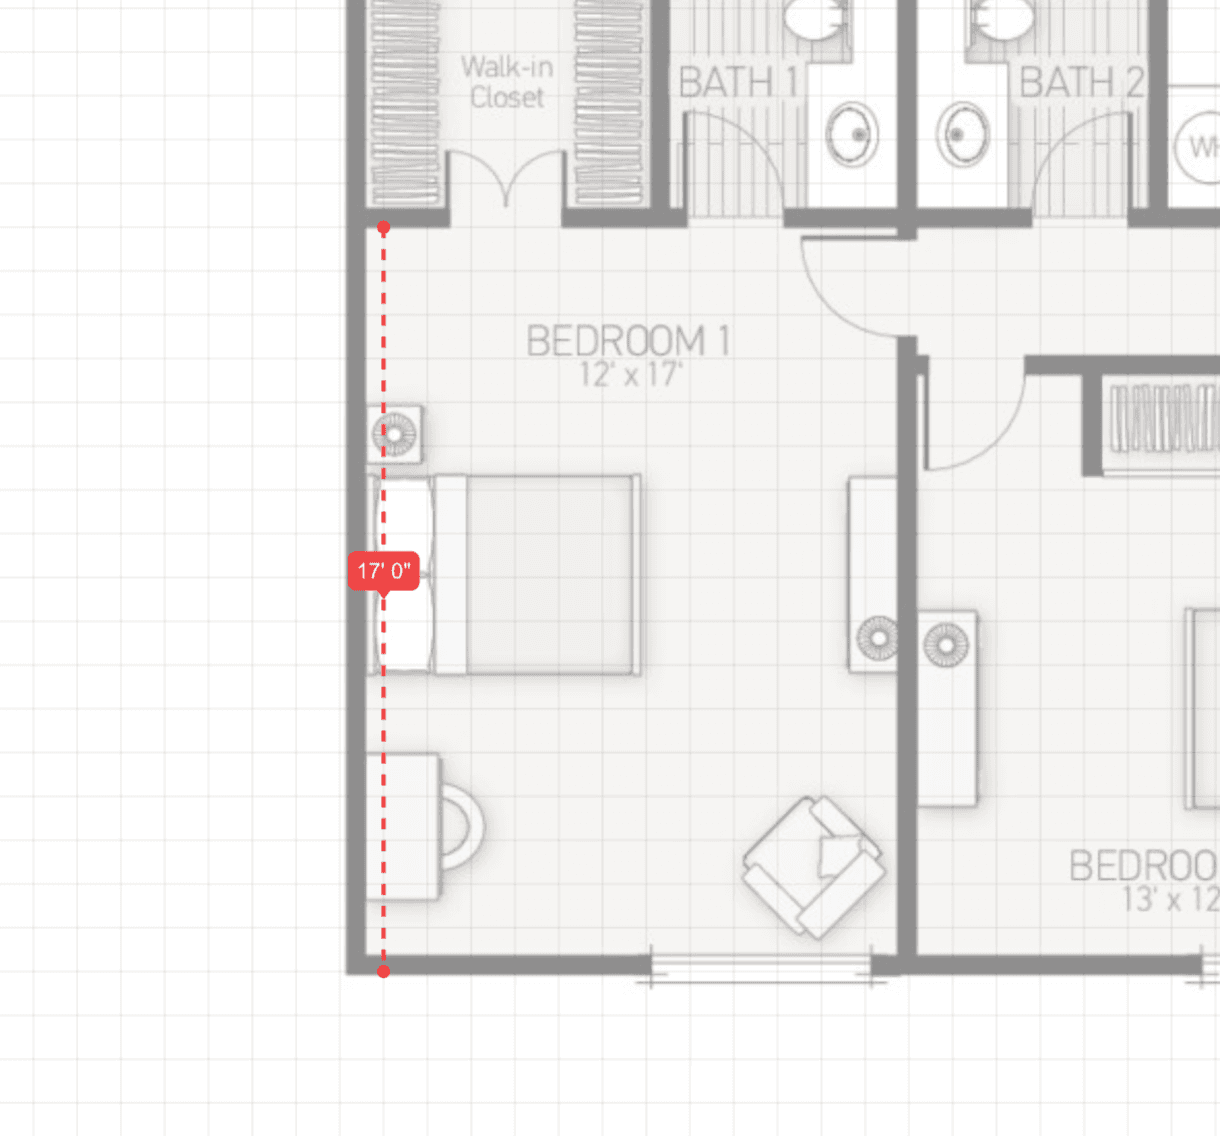
- Find a known distance: Look for a wall with a dimension written on it (e.g., "12' 0"). If there are no numbers, find a standard door. Interior doors are almost always 30 inches or 32 inches wide. Exterior front doors are usually 36 inches (3 feet).
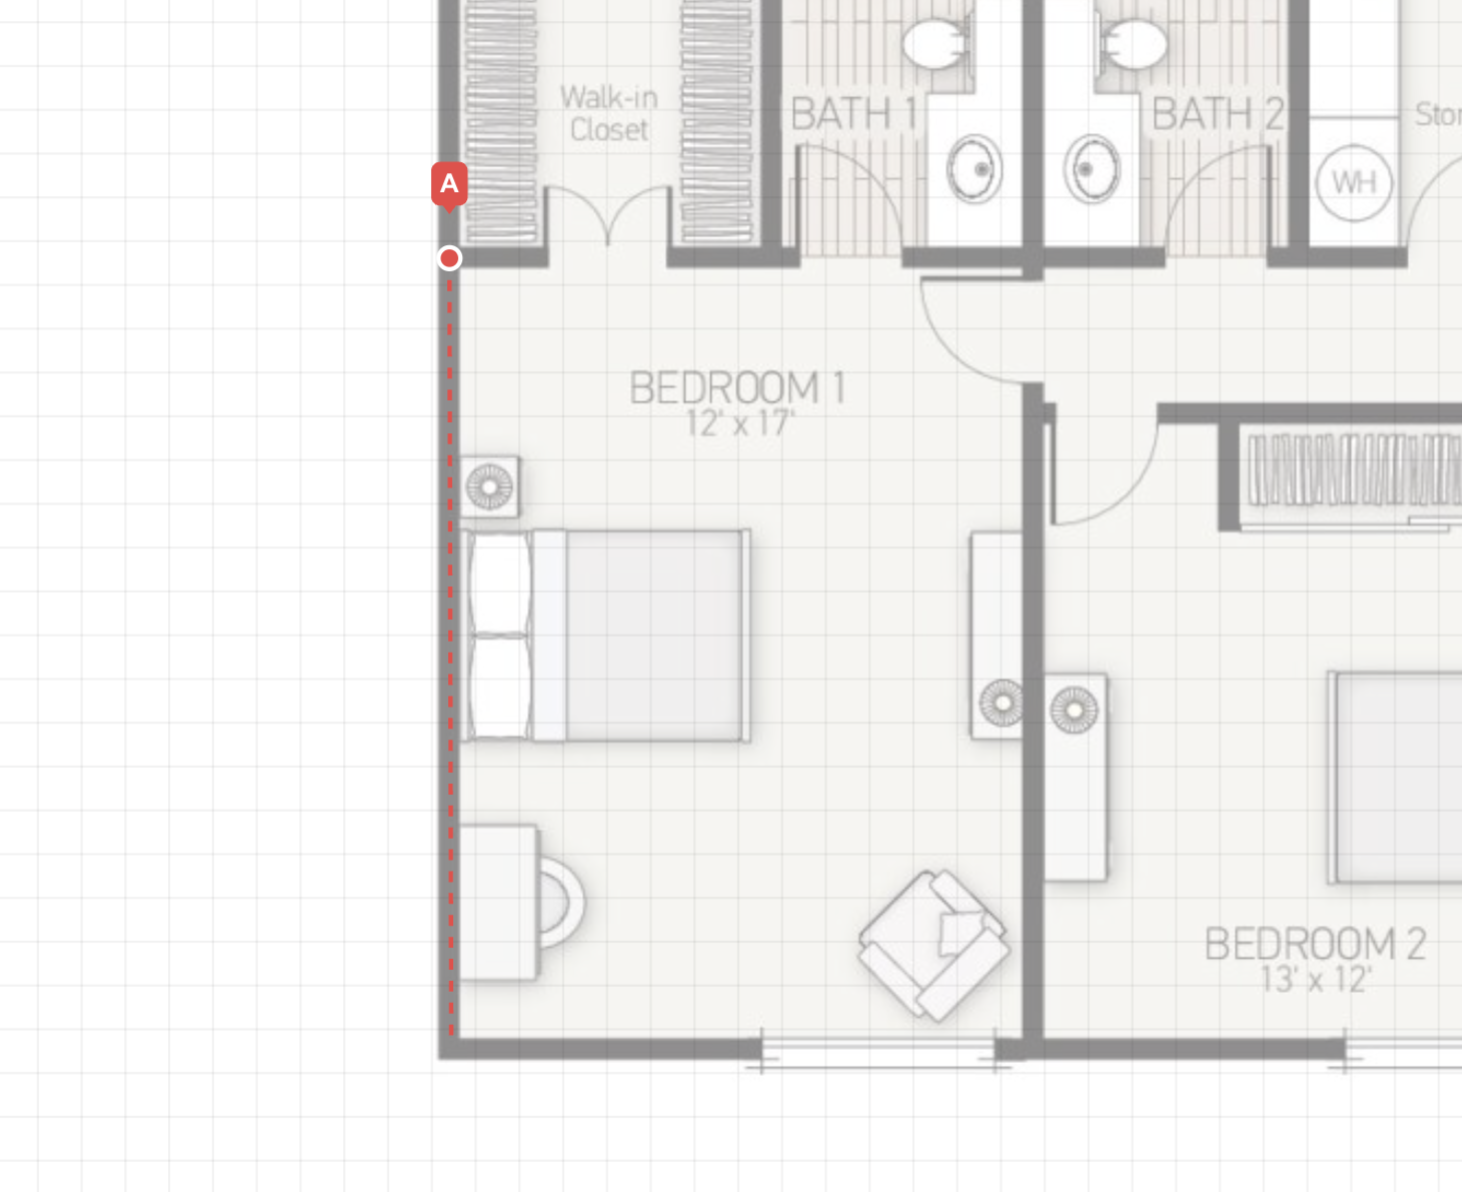
- Set the points: Click Point A and Point B on that known object.
- Enter the value: Type in the real-world distance (e.g., "3 ft").
Once you do this, our engine automatically scales the entire image. Now, every line you draw will be accurate to the inch.
Step 4: Trace Your Walls
Select the Wall Tool and just "connect the dots." Since the image is calibrated, you don't need to look at the dimension numbers. Just trace the black lines on your image.
I usually finish tracing a whole house in about 60 seconds using this method. Don't worry about being perfect pixel-by-pixel; you can adjust the walls later.
Step 5: Hide the "Mess"
Once your walls are up, go to the Layer Panel and toggle the visibility of the background image to "Hidden."
Suddenly, you have a clean, professional digital floor plan. Now comes the fun part: dropping in furniture, testing out new layouts, and seeing if that King bed actually fits.
Troubleshooting: Why doesn't it match?
Sometimes you trace the plan, but the measurements are slightly off. Here is why:
- Thick Lines: On old blueprints, the marker line might be 6 inches thick in "real life." Trace the center of the line for the best accuracy.
- Lens Distortion: If you took a photo with a wide-angle phone camera, the edges might be curved. Try to scan the document if possible.
Frequently Asked Questions
Q: Can I trace a PDF? A: Currently, you need to convert the PDF to a JPG or PNG first. A simple screenshot of the PDF works perfectly.
Q: How do I scale if I don't know any measurements? A: Find a standard appliance. A bathtub is almost always 60 inches long. A stove is almost always 30 inches wide. Use those as your calibration reference.
Q: Can I trace a landscape sketch? A: Absolutely. Use the same method to trace garden beds or patios. Just calibrate using a known distance like a fence panel (usually 6 or 8 feet).
Inspired? Start planning now.
Use our free browser-based tool to visualize this advice in your own home. No account needed.
Launch RoomyLab Editor